


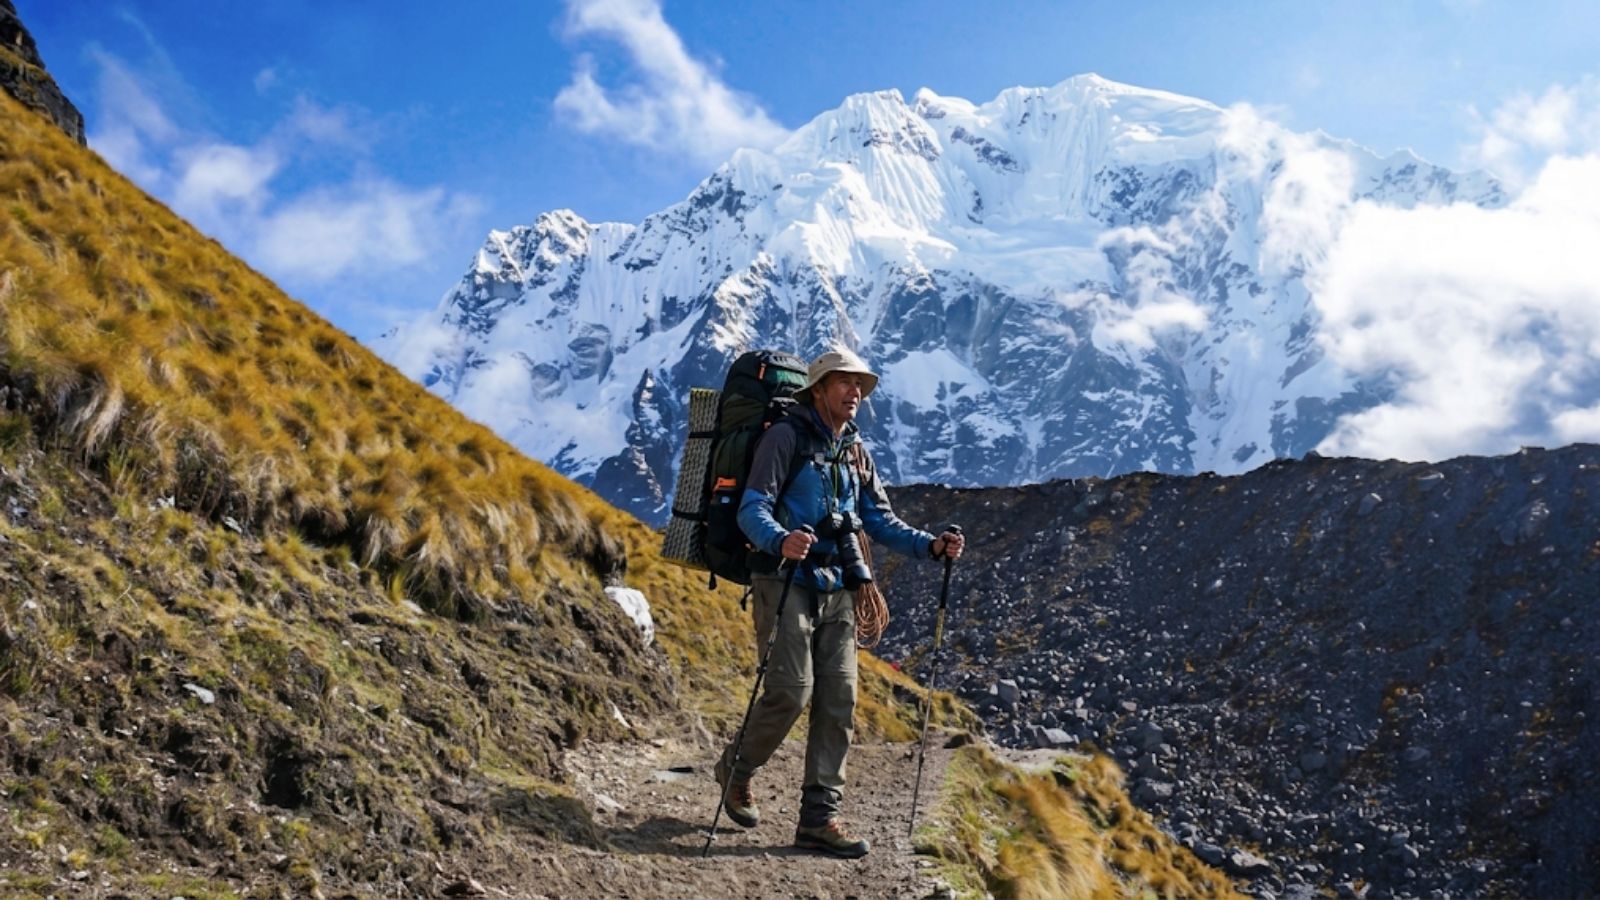
The Salkantay Trek combines long days of hiking, ascents, descents, and uneven terrain. Although many travelers are mainly concerned about altitude or reaching the Salkantay Pass, there is another aspect that deserves attention: how to protect your knees during several days of hiking toward Machu Picchu.
For some people, uphill sections are exhausting, but it is the descents that end up causing the most discomfort in the legs. Walking downhill requires continuously controlling your body’s movement and can be especially tiring after several hours of trekking.
This does not mean you need to have knee problems to complete the Salkantay Trek.
Gradual preparation, an appropriate pace, trekking poles, good footwear, and a reasonably light backpack can help you tackle the different stages more comfortably.
In this guide, you will find practical tips to prepare your legs, improve your downhill technique, and know what to do if knee pain appears during the Salkantay Trek.
Why might your knees hurt during the Salkantay Trek?
Salkantay is a mountain hike that crosses very different terrain and elevation changes over several days.
Tourist routes in the area pass through mountain sections, high-Andean areas, and trails that later continue toward lower-altitude areas. Peru’s Ministry of Foreign Trade and Tourism describes Salkantay as a hike through mountains and landscapes of the mountain range before continuing to Machu Picchu.
In this context, your knees are constantly working.
During ascents, you mainly use your leg muscles to propel your body upward.
On descents, those same muscles must control every step as you go down.
After several hours, fatigue can make you less precise when placing your feet or cause you to start walking with less controlled movements.
That is why protecting your knees is not only about wearing a knee brace. Leg preparation and the way you walk are much more important.
Descents deserve as much preparation as ascents
When someone trains for the Salkantay Trek, they usually look for hills to practice climbing.
It is excellent preparation, but it is also important to practice descents.
Walking downhill requires a different type of muscle work and can feel much more demanding after several hours.
A biomechanical study on downhill walking found that using poles changed and reduced different forces and moments measured around the knee. The study was small and conducted under controlled conditions, so it does not mean poles eliminate the risk of pain or injury, but it does support their usefulness as an aid during descents.
Before traveling, try to include ascents and descents, not just flat terrain, in some of your training hikes.
Strengthen your legs before the trip
One of the best ways to prepare your knees is to strengthen the muscles that help control their movement.
The American Academy of Orthopaedic Surgeons notes that strong muscles around the knee help support the joint, particularly highlighting the quadriceps and hamstrings.
It is also helpful to work the hip and glute muscles as part of overall leg preparation. The AAOS includes the glutes and hamstrings among the main muscle groups in its hip and thigh conditioning programs.
You do not need to do extreme training.
You can gradually prepare your legs through activities such as:
- Hiking.
- Moderate ascents and descents.
- Stairs.
- Strengthening exercises adapted to your level.
- Hikes carrying a backpack similar to the one you will use during the trek.
If you are not used to training, start slowly.
The goal is to arrive prepared, not get injured during the weeks before your trip.
Practice hiking before the Salkantay Trek
The gym can help, but hiking remains one of the best ways to prepare for a trek.
Try to do some routes that include different types of terrain.
For example:
Flat terrain: to gradually increase the time you spend walking.
Ascents: to get used to the effort.
Descents: to practice controlling your steps.
Uneven terrain: to improve balance and coordination.
If you will use poles during the Salkantay Trek, practice with them too.
This way, you will not have to learn how to use them during one of the most demanding days on the route.
How to descend better during the Salkantay Trek
There is no single technique that works for everyone and every type of terrain, but there are some simple principles.
Descend without rushing
You do not need to compete with other hikers.
The National Park Service recommends knowing your limits, taking your time, and paying attention to where you step, especially on slippery surfaces or difficult terrain.
Allow faster travelers to pass you whenever there is a safe place to do so.
Finding a comfortable pace is usually better than trying to keep up with someone who walks much faster than you.
Use controlled steps
On steep slopes, avoid speeding up unnecessarily.
Look where you will place your foot before fully transferring your weight.
The terrain can vary between rock, dirt, and wet sections, so it is best to adapt every step to the conditions.
Maintain a natural posture
Avoid walking completely stiffly.
Your legs need to move naturally to adapt to the terrain.
If you start to feel very tired, take a break before fatigue affects your walking technique too much.
Look a few steps ahead
Do not look only at your feet.
Look at the trail ahead to identify rocks, uneven sections, or slippery areas in advance.
This will help you choose where to place your next step more effectively.
Use trekking poles on descents
Poles can be particularly useful on a route with elevation changes like Salkantay.
Research on downhill walking found reductions of approximately 12 % to 25 % in several biomechanical measurements related to forces and moments around the knee when participants used poles.
Another study with hikers carrying different types of backpacks also found reductions in different measures of force, moment, and lower-limb power absorption when using poles during descent.
This does not mean poles guarantee that you will never experience discomfort.
However, they can provide additional support and help you control descents better.
How to use poles during a descent
When a descent begins, you can adjust your poles slightly longer than for an ascent.
The idea is to be able to plant them in front of your body without having to lean excessively.
A simple sequence would be:
- Place the pole ahead.
- Check that it is firmly planted.
- Move forward with a controlled step.
- Repeat while maintaining a natural rhythm.
You do not need to drive the poles into the ground forcefully.
They work as additional points of support.
If you have never used them, practice before traveling.
Do not wait until your knees hurt to take out your poles
A common mistake is keeping poles attached to your backpack throughout the descent and using them only once discomfort has already appeared.
If you know a long descent or uneven section is coming up, you can start using them from the beginning.
This way, they become part of your normal hiking technique and not just a solution when you are already tired.
Adjust your pace to the terrain
The Salkantay Trek is not walked at the same pace throughout the entire route.
There will be places where you can move comfortably and others where you will need to slow down considerably.
The National Park Service recommends that hikers know their limits, take breaks, and pay attention to how they feel during a hike.
If you are part of a group tour, you should not feel that you need to walk at exactly the same speed as the fastest travelers.
A good guide will organize the group while considering different paces.
Wear footwear with good grip
Appropriate hiking boots or shoes also make a difference.
Footwear with a suitable sole helps maintain more stable footing on dirt, rocks, and wet surfaces.
The National Park Service recommends wearing sturdy footwear appropriate for the terrain when hiking, as well as checking your gear before setting out.
Do not break in new boots on the Salkantay Trek.
Use them during your training hikes beforehand to check:
- That the size is correct.
- That your heel does not move too much.
- That your toes have enough room.
- That the sole has good grip.
- That you can walk comfortably for several hours.
Avoid carrying an unnecessarily heavy backpack
Every additional item you put in your backpack is weight you will carry for hours.
Before starting the hike, review what you really need for the day.
Normally, your daypack should contain essential items such as:
- Water.
- Sun protection.
- Rain gear.
- An extra layer of clothing.
- Snacks.
- Documents.
- Personal medication, if applicable.
- Camera or phone.
- Necessary personal items.
Avoid filling your backpack with items you probably will not use.
The National Park Service recommends realistically assessing how much weight you can carry comfortably and using a backpack with good support on multi-day hikes.
Use luggage transport if your tour includes it
Many organized Salkantay Trek services transport part of the main luggage with staff or pack animals, depending on the itinerary and operator.
If your agency offers this service, use it properly.
You do not need to carry your entire suitcase on your back every day.
Ask before setting out:
- How many kilos you can hand over.
- What you need to carry personally.
- When you will have access to your main luggage again.
- Which items should not go in the transported bag.
This way, you can keep your daypack much simpler.
Take breaks before you are completely exhausted
Resting does not mean you are unprepared.
Short breaks can help you regain focus and maintain a more controlled technique.
The National Park Service recommends taking frequent breaks and paying attention to how you feel during a hike.
Use these moments to:
- Drink water.
- Eat a snack.
- Adjust your laces.
- Check your poles.
- Adjust your backpack.
- Notice how your legs feel.
Then continue at your own pace.
Do knee braces help during the Salkantay Trek?
This is a common question, and there is no one answer for everyone.
If you regularly use a knee brace because a doctor or physiotherapist has recommended it, consult that professional about using it on a multi-day hike.
Buying a knee brace just before Salkantay and assuming it will prevent every problem is not a preparation strategy.
A knee brace also does not replace:
- Physical preparation.
- Poles.
- An appropriate pace.
- Good footwear.
- A well-organized backpack.
If you have a history of knee injuries, it is best to get professional advice before the trip.
Should I stretch during breaks?
Gentle movements can feel good after several hours of activity, but avoid aggressive stretching if pain appears.
The AAOS recommends that conditioning exercises should not cause pain and advises consulting a doctor or physiotherapist if an exercise causes discomfort.
You do not need to do a long workout session at every campsite.
After a day of trekking, resting, eating, hydrating, and preparing for the next day are also part of recovery.
What to do when you reach camp
After several hours of walking, take a few minutes to check how your legs feel.
You can:
- Take off your backpack.
- Change out of wet clothing if necessary.
- Walk gently around the campsite.
- Rest.
- Eat and hydrate.
- Prepare your gear for the next day.
If you felt a specific discomfort during the day, tell your guide.
It is much better to discuss the problem that afternoon than wait until you are hiking again for several hours the next day.
What should you do if your knees start hurting during the trek?
Do not ignore significant pain thinking that you absolutely have to continue.
First, inform your guide.
It may be necessary to slow down, take a break, or assess the available options depending on where you are.
The National Park Service recommends knowing your limits and not continuing beyond what you can safely do.
Avoid using medication simply to mask significant pain and keep forcing the joint without knowing what is happening.
If the pain is severe or gets worse, it is best to seek an appropriate evaluation.
Signs you should not ignore
A slight feeling of fatigue after hours of walking is different from an injury.
Pay closer attention if you experience:
- Severe pain.
- Significant swelling.
- A feeling that your knee is giving way or losing stability.
- Joint locking.
- Significant difficulty walking.
- Inability to move the knee normally.
- An injury after a fall.
The AAOS identifies pain, swelling, feelings of instability, locking, and loss of movement among symptoms that may appear with different knee injuries.
If something like this happens during the Salkantay Trek, tell your guide immediately and seek appropriate care.
If you already have knee problems before the trip
Having a history of discomfort does not automatically mean you cannot complete the Salkantay Trek.
But you should not ignore it either.
Before booking or traveling, speak with a healthcare professional who knows your situation and explain what type of activity you plan to do.
The National Park Service also recommends that people with medical conditions consider speaking with their healthcare provider before a demanding hike.
Also, inform your agency about any relevant condition before starting the route.
How to prepare your knees weeks before Salkantay
Walk regularly
Start going for walks and gradually increase the time, not the speed.
Add elevation gain
Look for routes with slopes to get used to going up and down.
Train for descents too
Walk down stairs or slopes with control. On Salkantay, knees usually suffer more on descents than on ascents.
Strengthen your legs
Work your quadriceps, hamstrings, and hips according to your level.
Practice with a backpack
Do some hikes with a weight similar to what you will carry on the trek.
Practice with poles
Learn to adjust them and use them uphill and downhill.
Test your boots beforehand
Salkantay should not be your first long day wearing that footwear.
Common mistakes that can increase discomfort
Training only for ascents
Descents need practice too.
Descending too fast
Controlling your steps is usually more important than passing the group.
Carrying poles but not using them
On a demanding descent, use them from the start.
Carrying too much weight
Check your backpack every morning and take only what you need.
Breaking in new boots
Do not try footwear for the first time during several hours of trekking.
Ignoring worsening pain
A small discomfort deserves attention before it becomes a bigger problem.
Always following the fastest person
Everyone has a different pace.
Do ascents affect the knees too?
Yes, although they usually feel different from descents.
During an ascent, your quadriceps, glutes, and other muscles work to propel your body.
When the slope becomes steeper:
- Shorten your stride.
- Maintain a steady pace.
- Use poles if you find them helpful.
- Take breaks when necessary.
- Avoid trying to climb too quickly.
At altitude, you should also consider that the effort may feel greater than expected.
The priority is not to reach the next point first, but to maintain a pace you can sustain.
Is it worth using poles even if I have never had knee pain?
For many travelers, yes.
You do not need to wait until you have a problem to benefit from them.
Studies on downhill walking show that poles can favorably modify some lower-limb load measurements during descents.
They also provide additional points of support on uneven terrain.
If you are going to use them, practice beforehand so handling them feels natural.
Quick tips to protect your knees on the Salkantay Trek
Remember these ideas before you begin:
- Train gradually before your trip.
- Practice both ascents and descents.
- Strengthen your legs.
- Use poles on descents if they feel comfortable for you.
- Descend in a controlled way.
- Wear suitable footwear.
- Avoid an unnecessarily heavy backpack.
- Rest when you need to.
- Do not compete with other hikers.
- Tell your guide if significant pain appears.
- If you already have an injury, consult a professional before the trip.
Most are simple measures, but together they can make several days of hiking much more comfortable.
Frequently asked questions about knees on the Salkantay Trek
Why can knees hurt during the Salkantay Trek?
Long days, elevation changes, and especially descents can cause fatigue in the muscles that control the knee. Gradual preparation can help you handle these demands better.
Do poles help your knees?
They can help during descents. Biomechanical studies have found reductions in different load measurements around the knee and lower limbs when walking downhill with poles.
Should I use one or two poles?
For trekking, two poles provide more balanced support. The important thing is learning how to use them and adjusting their length according to the terrain.
How should I train my legs before the Salkantay Trek?
Combine gradual hiking with strengthening the muscles that support the knees, especially the quadriceps and hamstrings. The AAOS highlights these muscle groups as important for joint support.
Is it advisable to practice descents before the trip?
Yes. Do not focus all your preparation only on going uphill. Practicing descents helps you get used to the movement and test your footwear and poles before arriving in Peru.
Do I need a knee brace?
Not necessarily. If you already use one because of a previous injury or condition, consult the professional who knows your case. You should not consider a knee brace a substitute for proper preparation.
What should I do if my knee hurts during the hike?
Reduce your effort and tell your guide. If there is severe pain, swelling, instability, locking, or significant difficulty walking, seek an appropriate evaluation.
Can I do the Salkantay Trek if I previously had a knee injury?
It depends on the injury and your current situation. It is best to consult a healthcare professional before doing a demanding hike and inform the agency about any relevant condition.
Can a heavy backpack make the trek more difficult?
A backpack with unnecessary weight increases the overall effort during several hours of hiking. Carry only what you need during the day and use the luggage transport service when it is included.
Do I have to walk at the same pace as my group?
No. A group can include hikers with different paces. Maintain a speed that you can sustain comfortably and safely.